
The Most Powerful Uses of PowerShell in M365
Modern IT departments have to move quickly with operations, provisioning, and configuration tasks. As organizations move to cloud Software-as-a-Service (SaaS) environments, like Microsoft 365 (M365), they are looking at ways to automate these tasks for efficiency, practicality, and consistency.
PowerShell for Microsoft 365 is an excellent way for organizations to automate and streamline daily tasks in the Microsoft 365 SaaS environment. Let’s show you how, but first, let’s cover some basics.
Office 365 or Microsoft 365?
You may quickly note that many references to the PowerShell modules refer to Office 365 PowerShell commands. Microsoft is still using both terms in various locations, with Microsoft 365 being the newest branding of Microsoft’s Software-as-a-Service (SaaS) platform. However, for most purposes, using Office 365 PowerShell commands is synonymous with PowerShell for Microsoft 365. Therefore, throughout this post, we will use the terms interchangeably.
Why use PowerShell for Microsoft 365?
Most Microsoft 365 or Office 365 administrators and helpdesk staff become proficient in using the Microsoft 365 admin center to manage and administer their Microsoft 365 environment. Utilizing the M365 admin center, you can take care of daily tasks that need to be accomplished. These tasks may include creating new M365 user accounts, troubleshooting passwords, managing licensing for users, and other user-specific administration.
It may also include administering services such as Exchange Online, Teams, SharePoint Online, and other Microsoft Office 365 solutions found in the Microsoft 365 cloud SaaS solution. While you can manage your Microsoft 365 effectively using the Microsoft 365 admin center, it may not be the most efficient way to administer, especially when it comes to managing your Microsoft 365 environment at scale.
Many administrators and junior administrators are familiar with GUI dashboards and “point and click” management interfaces. It is a great way to “get to know” a system and understand the management fundamentals. However, as you begin managing organizations at scale with hundreds or even thousands of users, the GUI-driven approach becomes very labor-intensive, slow, and inconsistent.
Today’s organizations are shifting to automated DevOps processes, from provisioning workstations to cloud resources and even cloud SaaS environment management. The heart of DevOps automation is scripting languages. There are many automation frameworks and scripting languages that businesses today can choose from for automation. However, PowerShell stands out as a frontrunner in many areas.
PowerShell has been around for quite some time, and many organizations have been heavily using PowerShell automation in on-premises environments for years now. In addition, PowerShell is a relatively straightforward scripting language to learn as it is very human-readable and consists of an intuitive verb-noun pairing for cmdlets used for scripting tasks.
Starting with PowerShell 2.0 integrated into Windows 7 and Windows Server 2008 R2, PowerShell has been integrated with each subsequent Windows release. In the newest releases of Windows 10, PowerShell is now the default command-line environment. So, it is a highly mature platform that most administrators are very familiar with now. Additionally, there are many PowerShell learning and other community-supported resources available.
One of the things that makes PowerShell robust is its modularized framework. You don’t have to wait for a new version of PowerShell to be compiled and released to include the capabilities you need. Instead, the PowerShell scripting environment allows the installation of modules. Modules are self-contained packages you install in PowerShell. These include the cmdlets, providers, functions, workflows, variables, and aliases for connecting to various technologies.
For example, many PowerShell modules provide the ability to interact with Microsoft and other technologies, such as Hyper-V. After installing the Hyper-V PowerShell module, you can configure, manage, and interact with Hyper-V installations.
PowerShell for Microsoft 365 or Office 365 PowerShell is not a separate PowerShell environment or tool. Instead, it is a set of specialized modules for Windows PowerShell that easily connects to your Microsoft 365 subscription and quickly runs commands from a management workstation located anywhere. The workstation only needs access to the Microsoft 365 environment and has the PowerShell for the Microsoft 365 module installed and loaded.
Being the creator and curator of PowerShell, Microsoft has ensured PowerShell has robust and seamless functionality integrated with their cloud Software-as-a-Service (SaaS) environment, Microsoft 365. Long story short, it works very well with Microsoft 365 and provides many powerful automation capabilities.
There are some things you can only do with PowerShell for M365
Microsoft quickly mentions that PowerShell for Microsoft 365 does not replace the admin center, the default management tool for Microsoft 365. Instead, in most cases, PowerShell for Microsoft 365 is a complimentary administrative tool used to perform bulk operations, consistent processes, and efficiently view/export information.
However, there is a critical reason admins need to use PowerShell for Microsoft 365. Admins can only perform some configuration tasks using PowerShell for Microsoft 365. What are some of these unique PowerShell capabilities for Microsoft 365?
PowerShell for Microsoft 365 can reveal information that you can’t see with the Microsoft 365 admin center
- PowerShell allows seeing low-level configurations and other data that you can’t see using the admin center
- Microsoft provides the example of Microsoft 365 licensing (and the Microsoft 365 features available to a user) depending on the user’s geographic location. With PowerShell for Microsoft 365, you can display this information for all of your users by using the command: Get-AzureADUser | Select DisplayName, UsageLocation
It has features that you can only configure with PowerShell for Microsoft 365
- As with many technologies, the deeper-level configurations are only exposed using the command-line
- As an example, Skype for Business Online, you can change the following with PowerShell for Microsoft 365 and not from the admin center:
- Anonymous users to gain automatic entrance to each meeting
- Attendees to record the meeting
- All users from your organization to be designated as presenters when they join the meeting
- Set-CsMeetingConfiguration -AdmitAnonymousUsersByDefault $False -AllowConferenceRecording $False -DesignateAsPresenter “None”
There are a couple of other strengths of PowerShell for Microsoft 365 that we have touched on but not detailed. What are these?
- PowerShell for Microsoft 365 is an excellent tool for bulk operations
- It allows easy data filtering
PowerShell for Microsoft 365 is an excellent tool for bulk operations
We touched on this earlier. However, PowerShell is great for bulk and automated operations. For example, when you have one task that needs to be performed on a Microsoft 365 object or service, logging into the admin center and completing the task manually through the GUI works well. A case in point would be changing the password for a single user in Microsoft 365.
However, what if hundreds or thousands of users need to have an attribute updated on their account? It might take hours, if not days, to go through the accounts manually and set the attribute. However, these types of tasks are well-suited for PowerShell for Microsoft 365 and may only take minutes to complete with a PowerShell script.
Additionally, once a PowerShell script is written, it can be reused repeatedly for the same types of processes in the future, saving even more time and administrative effort. Bulk operations may also involve many separate processes and tasks that need to be performed in a certain order or in a certain way. PowerShell allows capturing these processes in code to be repeated exactly the same way in the future.
Using PowerShell scripting in Microsoft 365 and Office 365 workflows facilitates a DevOps operational model. Code can be versioned, and changes can be documented as these are checked into the version control system. All the DevOps advantages come into play in this model, such as peer code reviews, change control, and other necessary requirements.
Data filtering with PowerShell with Microsoft 365
GUI management tools are usually not the best at filtering data. Filtering means you are searching on a subset of data based on the criteria specified. If the GUI tool is not explicitly written to display the data how you want to see it, you are out of luck. However, this is where the robust power of PowerShell for Microsoft 365 comes into play. With the filtering capabilities of PowerShell for Microsoft 365, IT admins can pull various data from the Microsoft 365 environment as they need to see it.
For example, note the following PowerShell for Microsoft 365 script that pulls Exchange Online users living in specific cities.
- Get-User | Where {$_.RecipientTypeDetails -eq “UserMailbox” -and ($_.City -eq “New York” -or $_.City -eq “San Francisco”)} | Select DisplayName, City
This one snippet of PowerShell code shows PowerShell’s robust capabilities when filtering objects for management and reporting purposes. It works hand-in-hand with the point described earlier – it allows revealing things not shown, or that can’t be changed in the admin center.
It bolsters data filtering in the same way since you have access to all the object’s attributes exposed via PowerShell, whereas these may not be visible in the admin center GUI.
How to connect to PowerShell for Microsoft 365
Now that we have explored the benefits and reasons for using PowerShell for Microsoft 365 let’s get down to how we use it. To begin using Powershell for Microsoft 365, you have to do two things:
- Install the required PowerShell for Microsoft 365 modules – these provide the cmdlets, providers, functions, etc. needed to communicate with the cloud SaaS technologies
Install the required PowerShell for Microsoft 365 modules
As mentioned earlier, PowerShell for Microsoft 365 is a collection of PowerShell modules that allow interacting with the various cloud services found in Microsoft 365. For this, you need to install the required modules. First, let’s look at installing the following primary modules that allow administering and managing your Microsoft 365 environment. The primary modules required for interacting with the core Microsoft 365 services include:
***Note*** there are other services and features in Microsoft Office 365. However, these are the core solutions used by most businesses today.
AzureAD PowerShell module
To install the AzureAD PowerShell module, run the following cmdlet:
- Install-Module -Name AzureAD
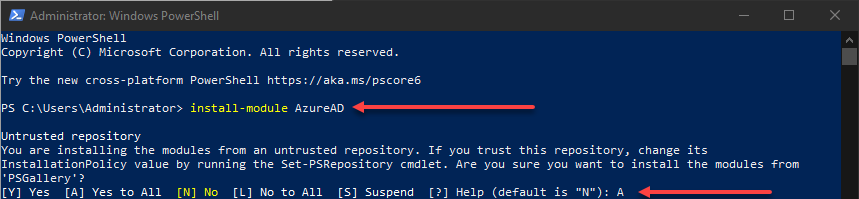
Accept the warning message displayed regarding the untrusted repository. You can check out a detailed AzureAD PowerShell module cmdlet reference here: AzureAD Module | Microsoft Docs.
Installing Exchange Online PowerShell Module
To install the Exchange Online Powershell module, run the following cmdlet:
- Install-Module -Name ExchangeOnlineManagement
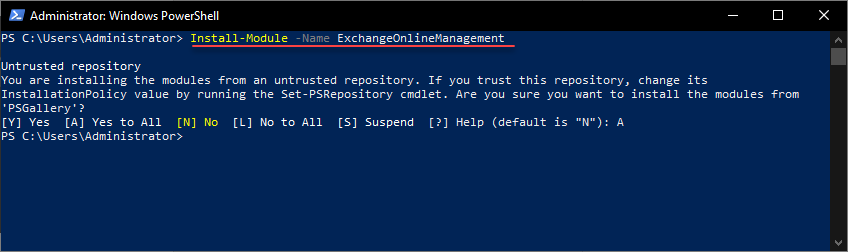
Accept the warning message displayed regarding the untrusted repository. For a detailed Exchange Online Management PowerShell reference, look at Microsoft’s Exchange Online PowerShell documentation here: Exchange Online PowerShell | Microsoft Docs.
Installing SharePoint Online PowerShell Module
To install the SharePoint Online PowerShell module, run the following cmdlet:
- Install-Module Microsoft.Online.SharePoint.PowerShell
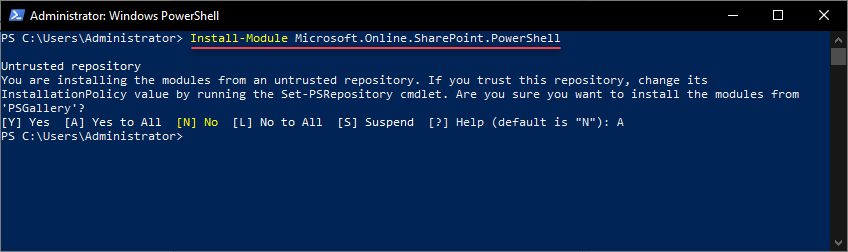
Accept the warning message displayed regarding the untrusted repository. You can find detailed information on the SharePointOnlinePowerShell documentation here: SharePointOnlinePowerShell Module | Microsoft Docs.
Installing Skype for Business and Teams PowerShell Module
The Skype for Business and Teams PowerShell module is a single module installed using:
- Install-Module -Name MicrosoftTeams
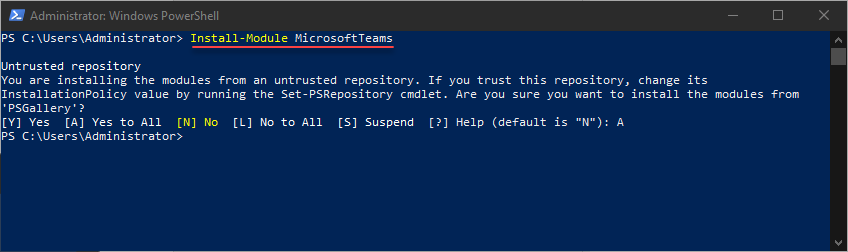
Again, accept the warning message displayed regarding the untrusted repository. Note the detailed Teams PowerShell cmdlet reference here: office-docs-powershell/teams/teams-ps/teams at master · MicrosoftDocs/office-docs-powershell · GitHub.
Connect your PowerShell installation to Microsoft 365
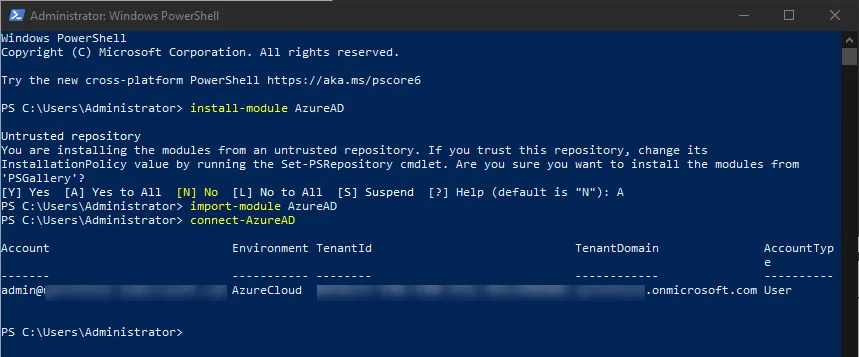
Once you have installed the AzureAD PowerShell module, you need to import it into your PowerShell environment and then connect your PowerShell for Microsoft 365 using your Microsoft 365 account. Use the following commands to import the module and begin connecting to your Microsoft 365 environment. The cmdlets include:
- Import-Module AzureAD

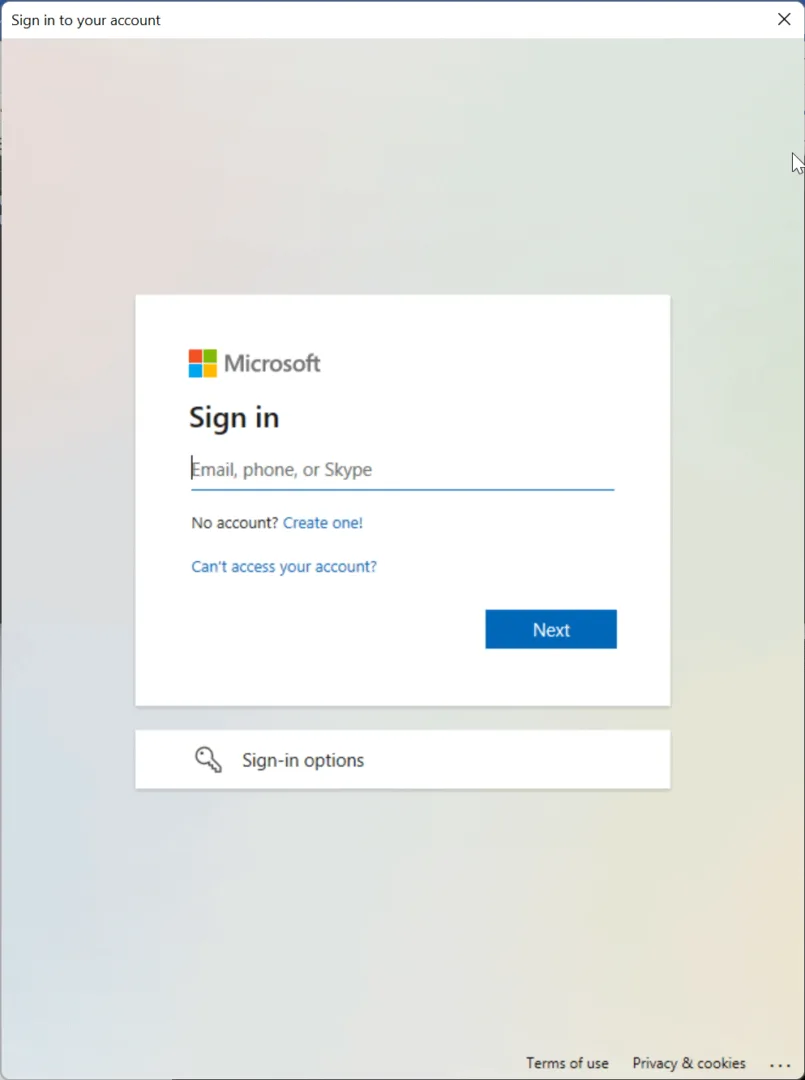
Once you import the Azure AD module and connect to your AzureAD environment, you will be prompted to enter your Microsoft 365 credentials in the popup box displayed afterward.
After successfully logging in, you should be taken back to your PowerShell prompt displaying the connected Azure AD environment.
A note about Windows PowerShell vs. PowerShell Core
If you are not aware, Microsoft has produced and currently supports two PowerShell versions – Windows PowerShell and PowerShell Core. Windows PowerShell is the version of PowerShell that has been around for years now and is embedded in the Windows operating system.
PowerShell Core is the new version of PowerShell based on .NET Core and is a standalone PowerShell install that is installed using an installation package. Even Windows 11 or Windows Server 2022 do not have PowerShell Core installed by default.
It is worth noting the difference as it can cause you to perform unnecessary troubleshooting when connecting to your Microsoft 365 environment if you use one or the other PowerShell environment and don’t use the correct modules. As an example, the AzureAd module is not supported in PowerShell Core. Instead, the AzureAz module is the supported module for interacting with your Azure AD environment in PowerShell Core.
Below is the PowerShell one-liner to install the Azure AD module in PowerShell Core. As you can see, it is different from using the Windows PowerShell install-module process.
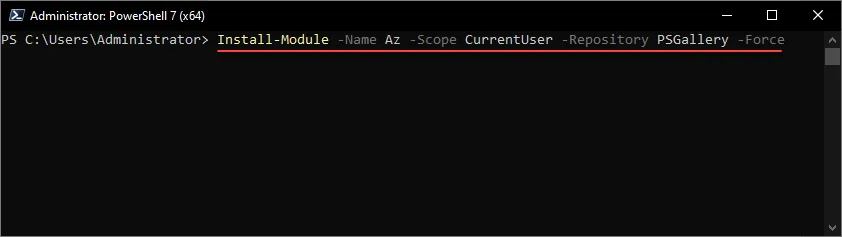
It is essential to keep the different PowerShell environments in mind when installing modules and work with PowerShell for Microsoft 365.
Connecting multiple PowerShell for Microsoft 365 services in a single window
As mentioned earlier, many organizations will be managing and administering multiple services with Microsoft 365, including:
- Azure Active Directory (Azure AD)
- Exchange Online
- SharePoint Online
- Skype for Business Online
- Teams
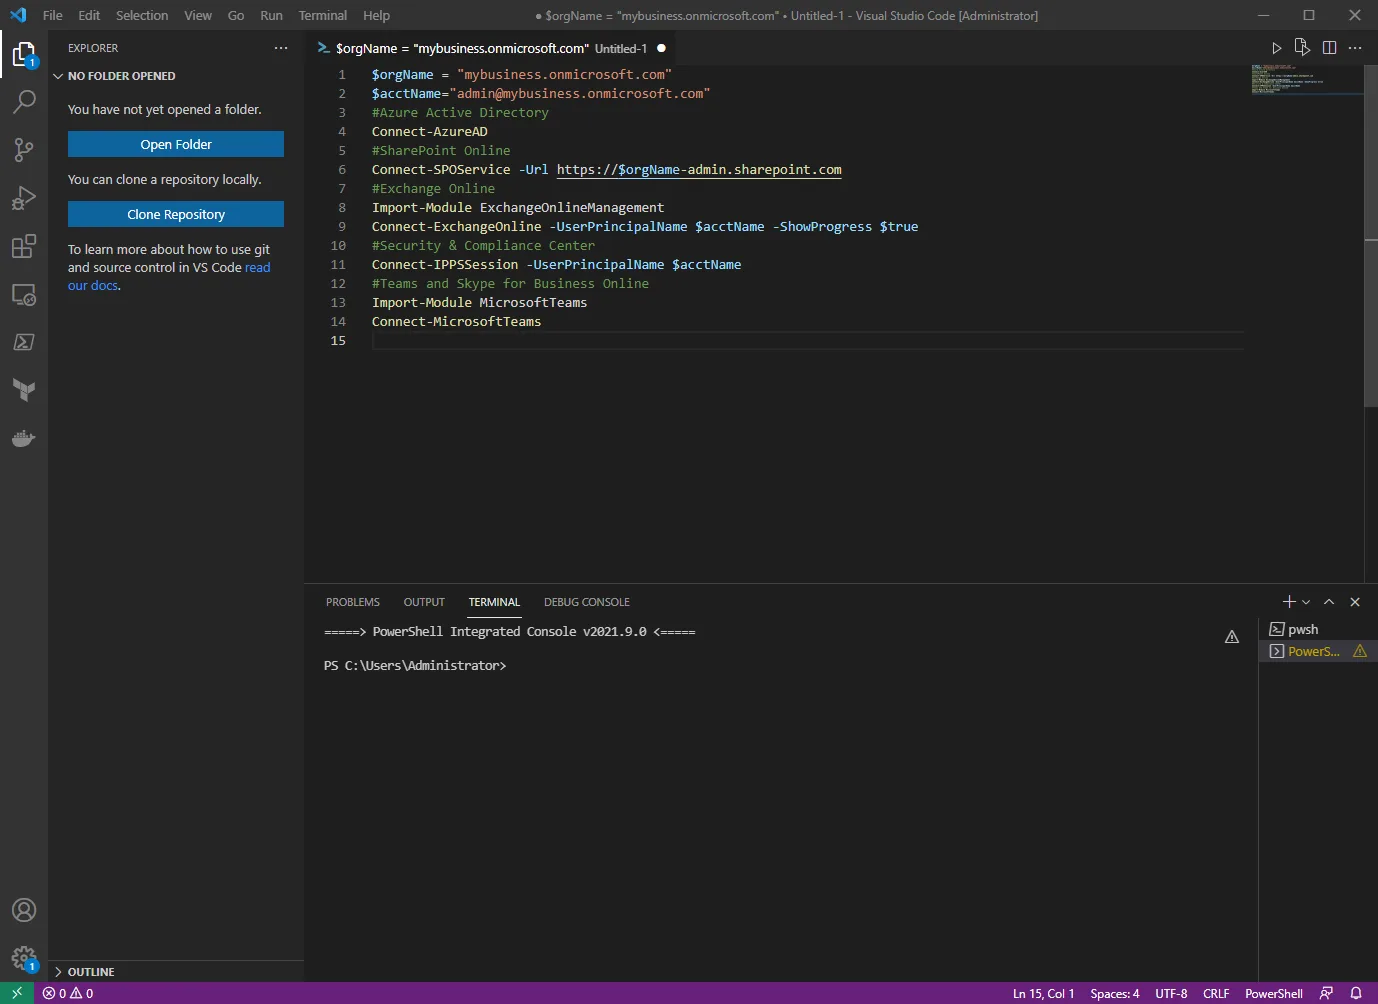
How can you manage all services in one PowerShell session instead of launching multiple windows connected to the various services? You can use the following example code block as a template for connecting to the various services across Microsoft 365 in a single session. Note the different services in bold.
$orgName = “mybusiness.onmicrosoft.com”
$acctName=”[email protected]”
$credential = Get-Credential -UserName $acctName -Message “Type the account’s password.”
#Azure Active Directory
Connect-AzureAD -Credential $credential
#SharePoint Online
Import-Module Microsoft.Online.SharePoint.PowerShell -DisableNameChecking
Connect-SPOService -Url https://$orgName-admin.sharepoint.com -credential $credential
#Exchange Online Import-Module ExchangeOnlineManagement
Connect-ExchangeOnline -ShowProgress $true
#Security & Compliance Center
Connect-IPPSSession -UserPrincipalName $acctName
#Teams and Skype for Business Online
Import-Module MicrosoftTeams
Connect-MicrosoftTeams -Credential $credential
As you can see, using the example code block above, you can store your credentials securely in the $credential variable, connect to the Azure AD service and import the relevant modules. It includes the modules to administer Azure AD, SharePoint Online, Exchange Online, Security & Compliance Center, Teams, and Skype for Business Online.#
Connecting multiple PowerShell for Microsoft 365 services with MFA enabled
If you have multi-factor authentication (MFA) enabled on your Microsoft 365 accounts (and you should!), the code block is slightly different for combining all services in a single Microsoft 365 window. As you notice below, we aren’t storing the credential in a variable.
$orgName = “mybusiness.onmicrosoft.com”
$acctName=”[email protected]”
#Azure Active Directory
Connect-AzureAD
#SharePoint Online
Connect-SPOService -Url https://$orgName-admin.sharepoint.com
#Exchange Online
Import-Module ExchangeOnlineManagement
Connect-ExchangeOnline -UserPrincipalName $acctName -ShowProgress $true
#Security & Compliance Center
Connect-IPPSSession -UserPrincipalName $acctName
#Teams and Skype for Business Online
Import-Module MicrosoftTeams
Connect-MicrosoftTeams
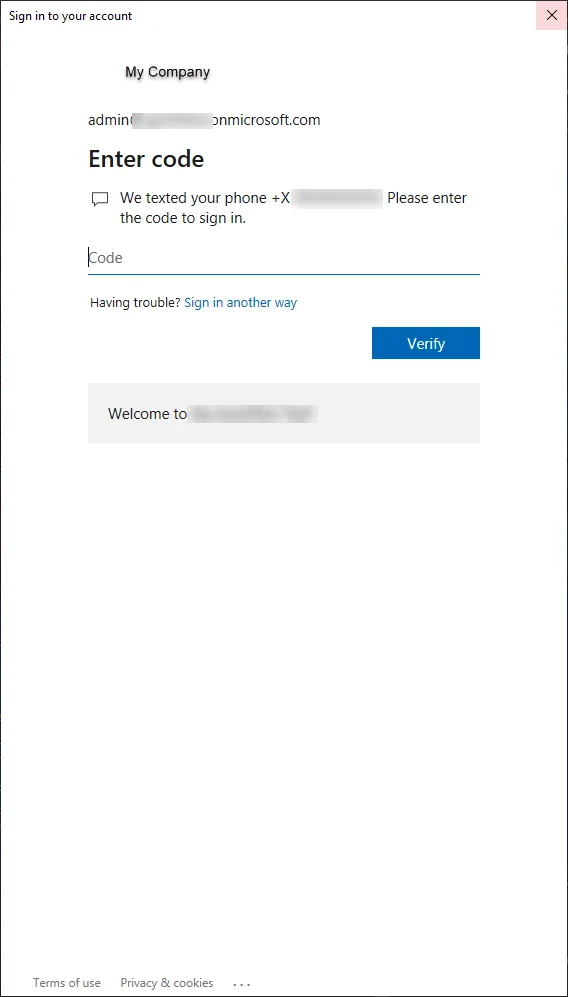
When you connect using this code block, you will see the popup asking you to sign in, and then it will push the one-time password to your mobile device. After receiving the one-time passcode, you will enter the code to finish authenticating.
Is Azure Cloud Shell an option for Office 365 PowerShell?
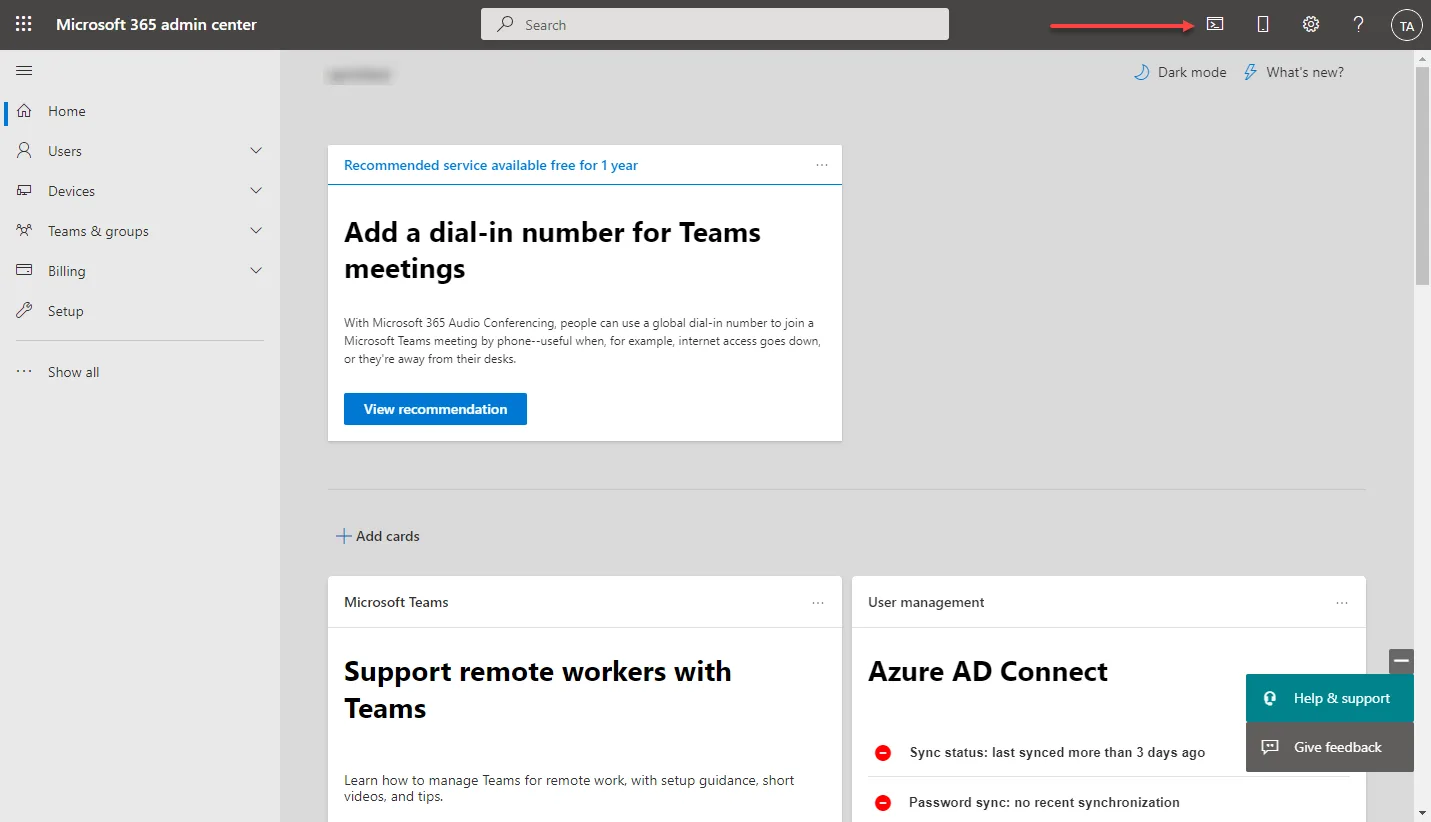
Microsoft is constantly working on improving the management tools available to admins managing Microsoft 365. Now, Microsoft 365 has a built-in way to access PowerShell “in the cloud” right from your Microsoft 365 admin center. Admins can access the cloud version of PowerShell for Microsoft by logging into the admin center and clicking the terminal icon in the upper right-hand corner of the screen.
It will allow you to choose between Bash and PowerShell.
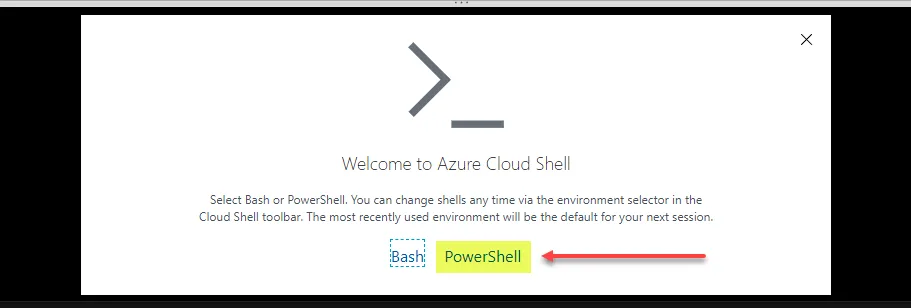
From Azure Cloud Shell, you can now use PowerShell to directly interface with your Microsoft 365 environment without the need for a management workstation with the PowerShell modules loaded.
What are common tasks well-suited for PowerShell for Microsoft 365?
PowerShell has been described as a “Swiss army knife” tool that can do many different things. The same is true in the realm of Microsoft 365. PowerShell for Microsoft 365 is a robust and powerful scripting language that allows administrators to streamline bulk processes, filter data, and automate workflows. Let’s look at the following PowerShell for Microsoft 365 cmdlets and see how they allow completing common tasks. These are just a few of the common tasks, among many others, that can be accomplished with PowerShell for Microsoft Office 365.
- Get a list of Microsoft 365 AzureAD module commands
- List Microsoft Azure AD users
- List Microsoft Azure AD groups
- List Exchange Online Mailboxes
- Change a user password in Microsoft 365
- Add a new Azure AD user
- Add a new Azure AD group
- Get subscription details
1. Get a list of Microsoft 365 AzureAD module commands
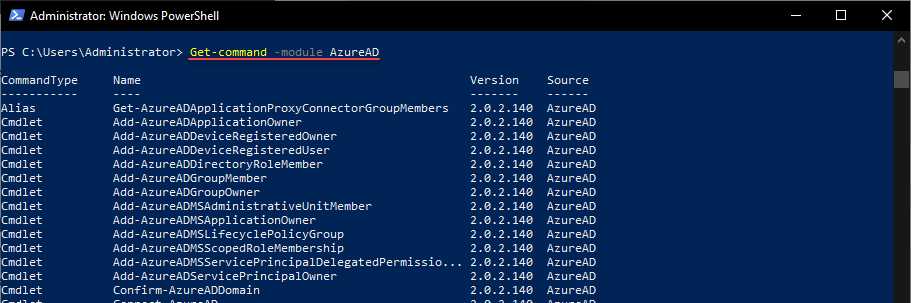
With the above walkthrough, we have the AzureAD module installed. However, how do we know what commands are possible with the Azure AD module? Use the following:
- Get-Command -module AzureAD
This command shows all the commands possible as part of the module.
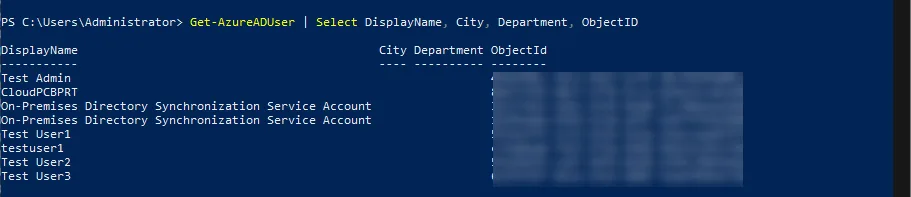
2. List Microsoft 365 Azure AD users
What if you want to list out your Azure AD users? You can do that easily with the following one-liner:
- Get-AzureADUser | Select DisplayName, City, Department, ObjectID
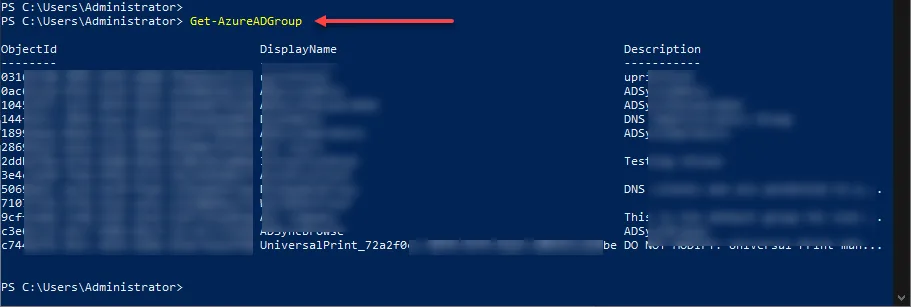
3. List Microsoft Azure AD groups
Use the following command to list out the Azure AD groups:
- Get-AzureADGroup
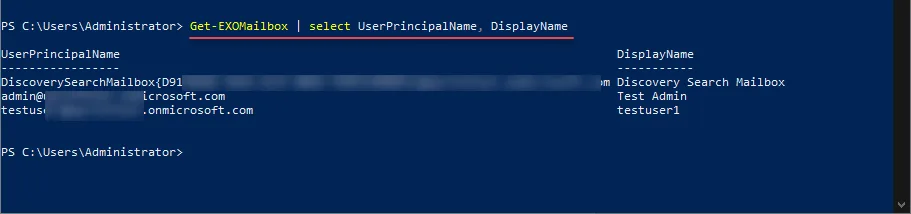
4. List Exchange Online Mailboxes
What if you want to know the users with Exchange Mailboxes configured? Using the Exchange Online Management PowerShell module, we can query specific mailbox information.
- Get-EXOMailbox | select UserPrincipalName, DisplayName
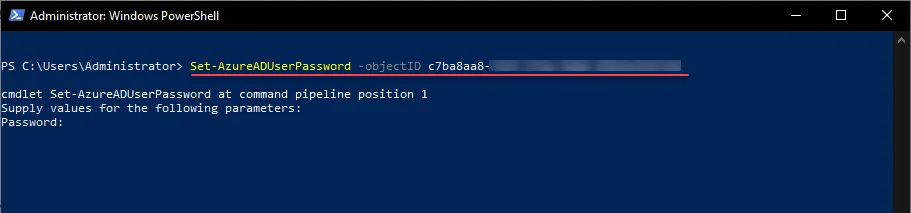
5. Change a Microsoft 365 user password
Changing a password is one of the most basic tasks of an administrator. Using PowerShell for Microsoft 365, you can easily change a user’s password from the command line.
- Set-AzureADUserPassword -objectID <object ID>
6. Add a new Azure AD user
Below is a PowerShell template that will allow adding a new Azure AD user. This can be used to fill in data from other sources to the Powershell template and loop through creating new users, using variables in the appropriate placeholders. $PasswordProfile = New-Object -TypeName Microsoft.Open.AzureAD.Model.PasswordProfile $PasswordProfile.Password = “<Password>” New-AzureADUser -DisplayName “New User” -PasswordProfile $PasswordProfile -UserPrincipalName “[email protected]” -AccountEnabled $true -MailNickName “Newuser”
7. Add a new Azure AD Group
Adding groups in Azure AD using PowerShell is equally easy. For example, you can use the below as a template for creating a new Azure AD group.
- New-AzureADGroup -DisplayName “My new group” -MailEnabled $false -SecurityEnabled $true -MailNickName “NotSet”
8. Get subscription details
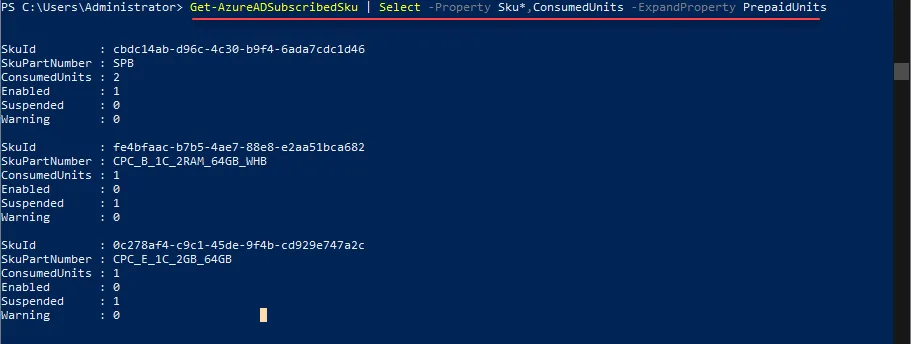
Having visibility to subscription details for your Microsoft 365 is extremely important. PowerShell for Microsoft 365 allows seeing this type of information quickly and easily. For a summary of the information about your current licensing plans and available licenses, use the following
- Get-AzureADSubscribedSku | Select -Property Sku*,ConsumedUnits -ExpandProperty PrepaidUnits
For details about the Microsoft 365 services that are available in all of your license plans, use the cmdlet:
- Get-AzureADSubscribedSku | Select SkuPartNumber

Debugging PowerShell code
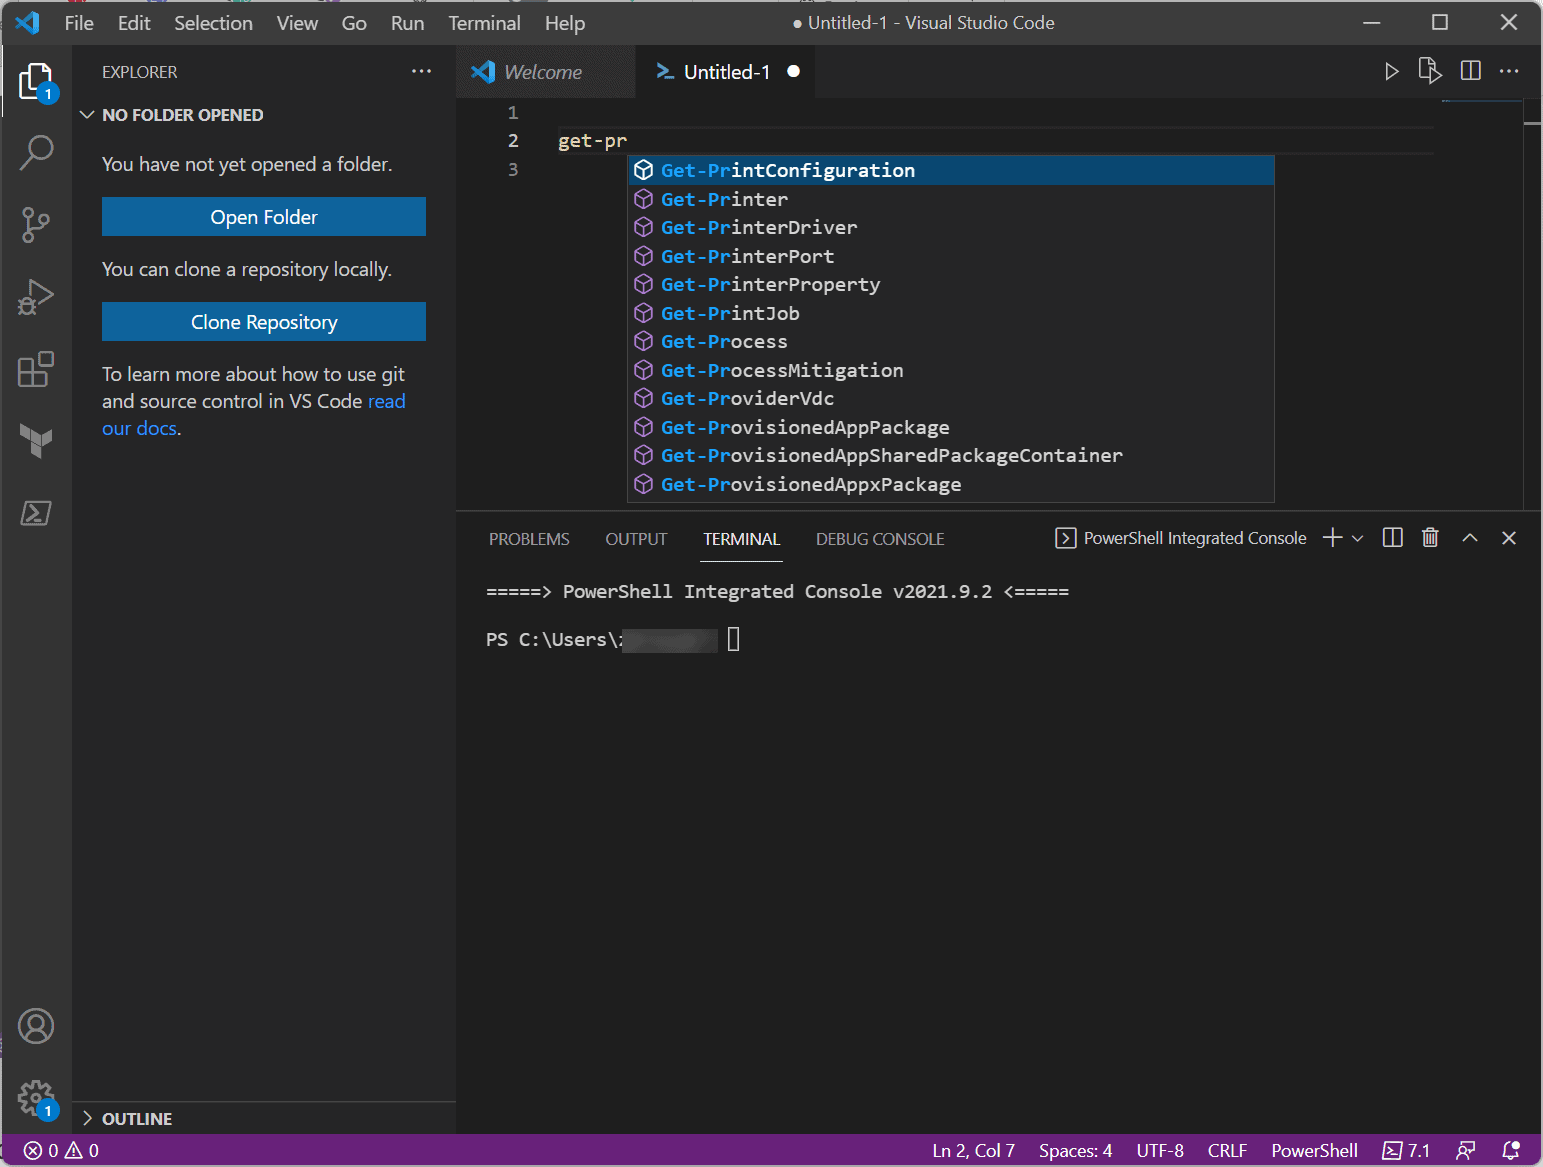
Many may wonder how you get started debugging PowerShell code, especially if you are new to working with PowerShell with Microsoft 365. One of the best ways to get started debugging PowerShell code is using a good Integrated Development Environment (IDE). Arguably one of the best IDEs out there for PowerShell is free – Visual Studio Code. Visual Studio Code (VS Code) is one of the easiest and most fully-featured IDEs available that provides robust features for PowerShell coding and many other languages. VS Code works off plugins installed to allow the platform to “understand” the language in which you are coding.
It features IntelliSense, tab completion, syntax highlighting, and many other powerful features when you are writing your PowerShell code for scripting or other purposes. It also features seamless integration with Git workflows, which allows easy integration with your existing version control system, a great feature (some would argue a requirement) for modern DevOps practices.
In addition to the official PowerShell plugin available for download in VS Code, there are dozens of third-party plugins that enhance VS Code’s coding and debugging experience. These plugins help extend the features natively found in VS Code and help those writing PowerShell scripts write more effectively and with fewer errors in their syntax.
What are some tasks where PowerShell isn’t the best tool?
PowerShell for Microsoft 365 is a great tool that can do some fantastic things for administrative tasks. However, when is it perhaps not the best tool for carrying out a task? While we have touched on this a bit, let’s think of when PowerShell might not be the best option for carrying out a task.
PowerShell is great for bulk operations and is well-suited for jobs that require many changes to be made or to make consistent changes for a large number of objects in the environment. However, PowerShell is generally not the best tool if a single change needs to be made as an ad-hoc operation. For example, an admin’s time would be better spent opening the admin center console and making the ad-hoc change there instead of formulating a one-off PowerShell script.
If there is no change control process in place, PowerShell may not be the best tool to introduce in the environment. Scripting languages are powerful and can perform many operations in very little time. However, it can be extremely dangerous if wielded without change control and a review of the changes made with the automated process. A single PowerShell script with incorrect logic could accidentally introduce devastating changes.
Following this same line of thinking, PowerShell is not the best tool when training new employees for management tasks. It is always better to understand management workflows from GUI tools as these are generally more intuitive for learning admin tasks.
Where can you find good PowerShell scripts for managing Microsoft 365?
There are many great resources on the web for PowerShell in general and Microsoft 365-specific PowerShell. Take note of the following resources, which are a great place to start:
The Future is Automated
Today’s challenging and fast-paced on-premises and cloud SaaS environments require organizations to be agile and move quickly to complete business-critical tasks. Microsoft 365 and Office 365 administration generally begin with IT admins performing tasks from the admin center. However, automation is a great way to complete very laborious tasks in bulk. Moreover, it allows for doing these in a streamlined and consistent manner.
PowerShell is a robust scripting language that can easily form the basis of your organization’s automation platform. As we have discussed, PowerShell for Microsoft 365 is a collection of modules that allow easy interaction with the services contained in Microsoft 365, such as Azure Active Directory, Exchange Online, SharePoint Online, and Microsoft Teams.
Using PowerShell with Microsoft 365 provides tools to complete tasks that can only be achieved using the command line and provides filtering capabilities for robust data queries. By using PowerShell for Microsoft 365, organizations can provision or change users in bulk. It can also programmatically create users and groups, configure user mailboxes, easily see licensing information, and create new SharePoint Online sites from the command line.
PowerShell’s automated and programmatic workflows bolster the DevOps processes adopted by businesses worldwide to ensure efficiency, consistency, change control, versioning, and many other benefits in the enterprise.